Watch me on the Hoardganize podcast!
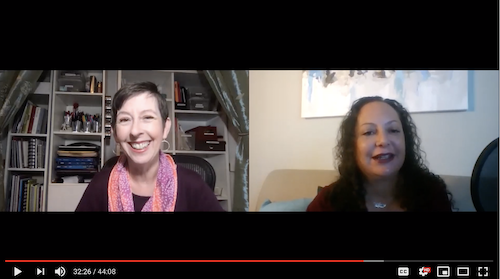
I enjoy being interviewed on other people’s podcasts. Since I’m a podcaster myself, I’m accustomed to talking on the fly and it’s fun to hear the kinds of questions that other podcasters have for me. Most of the interviews I do explore the confluence of two of my passions: organizing and genealogy. I feel like I can talk forever on that stuff. Most of the interviews I do are audio-only. That’s my sweet spot because I’m not distracted by how I look.
In case you’re interested, in 2019, I was a guest on these shows:
- The Sustainable Minimalists podcast
- Genealogy Happy Hour
- Generations Cafe (on organizing genealogy files)
- Generations Cafe (on downsizing and family history)
- Smead’s Keeping Your Organized podcast
- Hoardganize
That last interview, which was published on December 29, was a lot of fun. The Hoardganize podcast is hosted by fellow professional organizer Rachel Seavey of Collector Care. Rachel’s podcasts are video podcasts, a little outside of my comfort zone. (What do I wear? What kind of lighting do I need? Why do I make such funny faces when I’m trying to think of the answer to a question?)
Our discussion focused on genealogy, including getting started, getting organized, and some of my thoughts on best practices. Here are some highlights:
- Where to start: start with yourself and work up your tree (1:30)
- Gather the basic info: birth, marriage, death, censuses
- Track info in an Ancestry.com tree or download info and build a family tree using separate software
- Research direct lines (9:00)
- Move to collateral lines
- Using Family Search (10:25)
- Using libraries (15:06)
- U.S. research versus other countries (16:11)
- Organizing your documents (17:54)
- My file naming protocol
- Keeping track of what you’re doing now and what you want to research in the future
You can watch the video on YouTube or, if you prefer audio, listen to it on the Hoardganize website.
I had fun talking genealogy with Rachel. If you’ve been curious about exploring your roots, you might find it helpful! (And if you want to explore more, please check out my genealogy blog, Organize Your Family History.)
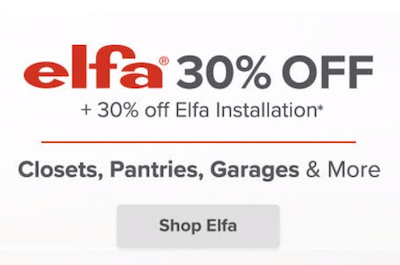
Oh boy! It's the annual Elfa sale!
I’m a big fan of the Container Store staff here in St. Louis does an amazing job of helping me help my clients using their products. Not only are they incredibly helpful, their products are of high quality. I am so grateful that we have a Container Store here in St. Louis.
The Container Store’s Elfa system is often my go-to for creating relatively inexpensive customized storage solutions. Right now it’s even more affordable because all Elfa is on sale for 30% off!
Here are some of my favorite Elfa solutions:
- Free-standing drawer systems (that’s how I store my yarn collection and I also love them for kids’ toys)
- The kids’ coloring table
- Closet systems (I blogged about how I used Elfa in a small reach-in closet in my office.
- Elfa file cart (I use three of them, each for a different category of files.)
- Garage solutions
The Container Store offers installation for their larger wall-mounted systems and installation is also 30% off during this sale, which usually runs until about Valentine’s Day. If you’re tempted by an Elfa closet, now’s the time to check it out. If you have a store near you, just bring in your measurements and they’ll offer you free design services. If you’re not near a store you can use their online design tool.
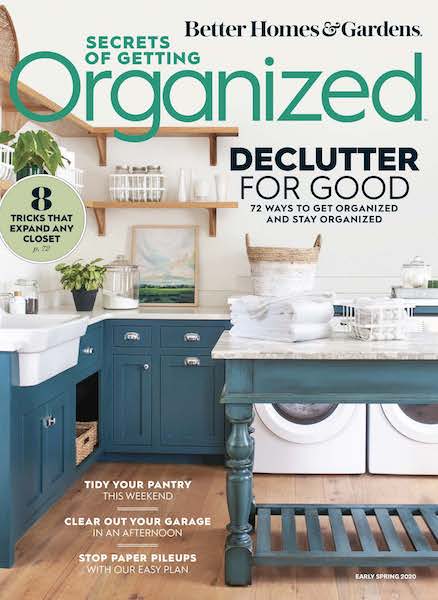
I'm in the latest issue of Secrets of Getting Organized magazine!
I am so grateful to be consulted regularly by the editors of Secrets of Getting Organized magazine from Better Homes & Gardens Special Interest Publications. The new issue (early spring 2020) has just hit the newsstands.
This beautiful magazine is chock full of really great organizing ideas (and beautiful photographs—it’s truly organizing eye candy). The 96-page magazine is free of ads and full of great advice. I encourage you to pick up a copy wherever you buy magazines. It will remain on the newsstands until March 20.
I was one of a dozen professional organizers from around the country who were interviewed for the magazine, and one of five organizers who offer tips in an article called Get Organized Before You Move. If you have a move on the horizon, you might find it helpful!
Here’s the cover, so you can spot it easily. I feel so fortunate to be included!
Set yourself up for success with your goals
I’m deep into thinking about my 2020 goals. There’s something about a year that ends in zero that makes it feel extra important. Maybe it’s because we’re starting a new decade, The Twenties. (It’s so bizarre that soon The Twenties will have nothing to do with flappers.) I love the process of setting goals for the new year and I really enjoy taking a whole day to work on my goals. This year, like last year, my big retreat day is December 26. I can’t wait!
At this time last year, Shannon Wilkinson and I launched a goal-setting product, Good Enough Goal Setting that I’ll be using again this year as part of my retreat day. (Shannon and I co-host the Getting to Good Enough podcast.) Shannon and I have been working together a long time and ten years ago, in 2009, we created a teleclass about setting and keeping resolutions. The following year, we created a workbook to go with it. After selling it for a few years, we took it off the market.
Last year, we brought it out and dusted it off after we realized that our resolutions teleclass really fit in to our good-enough philosophy. We updated it and renamed it Good Enough Goal Setting.
I was so excited when I listened to the teleclass and went through the workbook because it is still so relevant and helpful. The audio includes guided hypnosis, which can be very useful in the goal-setting process. (Shannon is a certified hypnotherapist.) I’m looking forward to listening to it again during my retreat day!
We’re offering the 25-page Good Enough Goal Setting workbook for $15. With it, you automatically get the 2009 teleclass (with the guided hypnosis). I think it’s a great tool to help you set realistic and achievable goals (and then go about achieving them!). If you listen to the teleclass, bear in mind that was done over the phone so the audio quality is not up to 2019 standards. We’re thankful that our podcast sounds much better!
We discussed Good Enough Goal Setting in Episode 30 of Getting to Good Enough. You can listen to that episode on the podcast’s website, or wherever you get your podcasts. Episode 83, to be published on December 26, 2019, is a re-airing of that episode.
I encourage you to check out the workbook + audio. It’s a small investment to set you up for a great 2020!
Just click on the View Product or Add to Cart button to purchase via PayPal!
Slaying the email dragon

I try hard not to let my email inbox for my business get out of control. I use a different email when I shop so it’s not flooded with too much non-business related email. In the past, I’ve embraced inbox zero and I’m considering a regular inbox zero habit as one of my 2020 goals.)
Yesterday I had an unexpected day at my desk because of a winter storm and I spent some time getting my inbox under control. It was fairly painless. I started the morning with 267 messages in my inbox, 18 of them unread. (I use my Mac’s email client—the one with the icon of a postage stamp—on my desktop.) I decided that I wanted to get my inbox down to 20 messages and I wanted to do it swiftly. Here’s what I did.
- I set a timer for five minutes. I sorted my messages by sender. That allowed me to do some bulk deletes, like the many-times-a-day messages I get with headlines from the Washington Post. I’m not great about deleting those in real time. So in my first five minutes, I deleted all of them, along with other regular messages I get. At the end of the first five minutes, I had 191 messages left, 9 of the unread.
- I set a timer for another five minutes and continued going through my inbox. I deleted a lot, I archived some messages, I filed a few. (I have a Clients folder, for example, where I file messages from clients.) At the end of that five minutes, I had 128 messages, 6 of them unread.
- You guessed it: I set my time for another five minutes and got the inbox down to 64 messages, 3 unread.
- I set my timer for a final five-minute session. At the end of it, I’d met my goal: 20 messages, 0 unread.
To recap, in 20 minutes of focused effort yesterday morning, I reduced my inbox from 267 messages to 20 messages.
Throughout the day, I tried to stay on top of my inbox. This morning, I forgot to notice how many were there when I got up but I did spend a little time with my inbox and got it down to five messages. I was going to call that done. I started to write, “I’m reluctant to move these messages because they remind me of some actions I need to do.” But then I realized that’s why I have a task management system. So I forwarded a couple of emails to Evernote, added a couple of items to my Trello task-management board, archived one message and now I have an empty inbox!
I know from past experience that once I’m at zero it becomes much easier to keep it at zero. I’m going to try to maintain inbox zero this week (a very busy client week) and see if it might be an achievable goal for 2020. This feels great!
Preparing for an organizing appointment
It’s not unusual for a new client to ask me what she should do before I arrive at her home for the first time. (And, yes, most—but not all—of my clients are women.) Most assume they need to clean up the house.
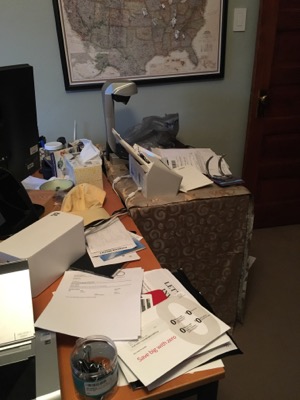
I almost always suggest that the client not clean up her home before our appointment. Piles and messy spots can be revealing. They reveal where the client and/or her family naturally tends to rest stuff. They typically reveal the stuff that’s actually in use. And they certainly reveal an absence of a working system for handling the mail.
There’s no need to be ashamed of piles and messy spots. It’s why you’re looking for help, after all. (And believe me, I’ve had professional organizers help me in my home, so I understand the discomfort of not cleaning up.)
There is something you can do prior to your organizing appointment that is really helpful: Spend a little type visualizing what you would like your space—and your life—to be once you achieve your organizing goals. Try to put that vision into words that you can share with your organizer. Knowing what success looks like is a huge part of achieving it. And being able to communicate that vision of success will really help your organizer.
So I suggest you put aside the notion that you have to clean up. Take that energy and put it into thinking and perhaps writing down what you desired when you decided to call in an organizer. And, please, be kind to yourself. Self-recrimination over a messy space doesn’t do you or anyone else any good.
Letting holiday cards be easy

I don’t celebrate Christmas, so December is a very easy month for me. I give few gifts so I don’t have to worry about shopping. And I don’t decorate at all.
But I do enjoy sending holiday cards. I actually always send out New Year’s cards because I like that they’re secular and they take away a little of the time pressure. I send two sets: One for Peace of Mind Organizing clients and colleagues and one for personal friends. (The personal set always sports a picture of our beautiful standard poodle, Bix, on the front.) Over the years I’ve been simplifying and making the process of sending out cards easier and easier.
How do I keep it simple? My secret weapon is Minted.com. I’ve been ordering from them for years and don’t even consider taking my business elsewhere.
As I detailed last year, here’s why I love Minted:
- They offer beautiful cards (both photo and non-photo) designed by independent artists who win design competitions for the privilege of being included.
- They offer addressing of the envelopes at no additional cost, in a design that complements the card. This is a huge time saver and looks great.
- The quality of the card stock is excellent and they offer a number of options (like printed return addresses, “skinny wrap” return address labels, printed card backs and envelope liners) to snazz it up. You can customize both the front and back (or inside) of the cards.
- They offer flat, as well as folded, cards. And they also offer postcards.
This year, I picked out my design, then edited last year’s address list. I removed a few people and added some more. Then I ordered stamps from the postal service’s website. The whole thing took an hour or so, partly because I didn’t let myself agonize over the decision. There are many beautiful designed from which to choose, but I went with the first one that caught my fancy.
For our personal cards, we opted for a postcard. Minted allows you to upload the photo so you can see how it looks with various designs. Genius! It was an easy choice this year and my husband Barry was enthusiastic about it. I chose to leave the back of the postcard blank, so I’m jotting a brief message and hand addressing the cards. We saved money because postcards are less expensive to print and the postage is less. (That’s a picture of this year’s postcard at the top of this post.)
My business holiday cards come pre-addressed, but I do write a personal message on each. (I opted for the flat cards that go in envelopes.) I ordered 125 business cards and 65 personal postcards. I’ve been writing a dozen cards and six postcards each evening. That’s easy and pleasant and will be done in four days.
I love sending out holiday cards, but if you don’t I encourage you to take that particular task off your list. As a card enthusiast, I always enjoy receiving cards but I don’t notice if someone doesn’t send me one. I’d be willing to bet that no one will hold it against you if you choose not to send cards! (And as an aside, you have my permission to let go of the cards you receive either right when they come in or after the holidays are over.)
But if you do enjoy sending holiday cards, you might look into ways that you can make it easier, like ordering online and having the addresses printed on your cards. Minted makes that easy. (By the way, that’s an affiliate link; if you use it I get a small commission that doesn’t affect your price.)
Holiday cards don’t have to be a burden!
Links
- NAPO St. Louis
- Are you interested in becoming a professional organizer?
- Ravelry
- Shannon Wilkinson, life coach
- Institute for Challenging Disorganization
- Getting to Good Enough podcast
- Peace of Mind Spending
- National Association of Productivity and Organizing Professionals
- Organize Your Family History


