The life-changing magic of merino wool

In December 2020, I bought my first Wool& merino wool dress and I wore it for 100 days in a row. The challenge changed everything for me.
One year and 10 months later, I have worn merino every single day except maybe a half dozen oddball days. I now own a whopping 15 wool dresses, plus a tunic, two cardigans, four pairs of leggings, two pairs of bike shorts, some culottes and a Moto jacket, all from Wool&. That feels like a lot of clothes, but it’s really all I wear.
I’m in the midst of a 30-day challenge, wearing the cinnamon-and-navy striped Margo shift dress. It’s a heavier dress than the Rowena swing dress that I wore for the 100-day dress challenge and I absolutely love it. It’s so comfortable and cozy; I love the way it looks and feels. (You can get a peek at it in the photo above.)
So what happened? Why am I so in love with these merino wool blend dresses? Here are a few of the reasons I love this way of dressing:
- Less laundry. I do laundry weekly but probably wash no more than two dresses in any given week.
- No smell. Merino wool is odor resistant. I hang the dress I wore on the back of my bedroom door and it sells fresh in the morning.
- No wrinkles. I stopped ironing years ago, so I love that none of these garments require ironing.
- They’re soft. Wool gets a bad rap for being itchy. But, at least for me, merino wool doesn’t itch.
- They’re temperature regulating. I wear these dresses year round, here in St. Louis where it gets both hot and cold.
- I have fewer decisions to make. Right now, since I’m in a 30-day challenge, I know what I’m going to wear every day. But even when I’m not in a challenge, my choices are more limited than they used to be. And I love that.
- The wonderful Facebook community. There’s a great Facebook group called Wool& 100 Day Dress Challenge full of positive energy and support for all body types. It keeps me on Facebook, frankly.
- These garments have a resale value. This isn’t fast fashion. Almost every Wool& piece sells for more than $100 retail and enthusiasts are happy to purchase used garments at near-retail prices because the quality is so high. I have bought and sold many dresses in the Wool& Buy/Sell/Trade Facebook group.
Wool& is by no means the only company that sells great Merino wool garments. I wear wool t-shirts from Woolly and wool underwear from Icebreaker. (I know that wool underwear sounds really uncomfortable to some people, but it’s amazing!) I focus on Wool& because I know and trust them and it limits my choices, which, again, is very helpful to me as someone who is easily overwhelmed by choices.
For me, Wool& dresses have been like eating potato chips. I couldn’t stop at one! But these garments have made getting dressed and feeling good about how I look much easier. And that’s a very good thing.
Worth repeating: What to do before an organizing appointment
I published this five years ago and it’s as true now as ever, so I thought it was worth repeating.
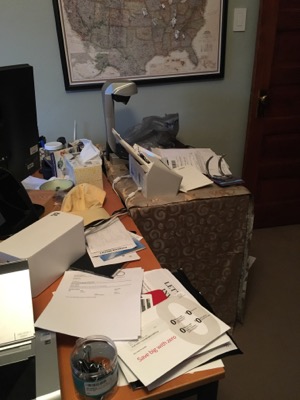
It’s not unusual for a new client to ask me what she should do before I arrive at her home for the first time. (Most, but not all, of my clients are women.) Most assume they need to clean up the house.
I always suggest that the client not clean up her home for me. Piles and messy spots can be revealing. They reveal where the client and/or her family naturally tends to rest stuff. They reveal the stuff that’s actually in use, typically. They reveal an absence of a working system for handling the mail.
There’s no need to be ashamed of piles and messy spots. It’s why you’re looking for help, after all. (And believe me, I’ve had professional organizers help me in my home, so I understand the discomfort of airing my dirty laundry, so to speak.)
What you can do that is helpful is to spend a little type visualizing what you would like your space—and your life—to be once you achieve your organizing goals. Try to put that into words that you can share with your organizer. Knowing what success looks like is a huge part of achieving it. And being able to communicate that vision of success will really help your organizer.
So I suggest you put aside the notion that you have to clean up. Take that energy and put it into thinking and perhaps writing down what you desired when you decided to call in an organizer. And, please, be kind to yourself. Self-recrimination over a messy space doesn’t do you or anyone else any good.
Curious about using a bullet journal?
I’ve been using a Bullet Journal since late December 2021. I played around with it for the last couple of weeks of 2021 and then started officially on January 1, 2022. On February 15, I published a pretty robust blog post about how I bullet journal. Six months later, I thought it was time for an update.
But before I talk about how my bullet journal practice has evolved, I wanted to share a few pieces of advice for those of you who are curious about doing it yourself. It’s really easy to get tied up in perfectionism when starting out with a BuJo. (Episode 188 of the podcast I co-host, Getting to Good Enough, was all about that.) So here are some things to keep in mind:
- There’s no right way to do a bullet journal.
- The beauty of the bullet journal is that it’s entirely customizable.
- Your bullet journal doesn’t have to be beautiful (though it’s okay if it is).
- Don’t let the ultra-artistic bullet journalers on YouTube (there are many) intimidate you.
- You can start your bullet journal one way and change how you do it
If you have no idea what I’m talking about, I encourage you to check www.bulletjournal.com, the website of the originator of the concept, Ryder Carroll. It can give you a great grounding in the concept. Then go make it your own.
Here’s my update on my bullet journaling:
I still love it. I use my bullet journal virtually every day. In the 10.5 months I’ve been using it as my task and project management system, there have been probably three days that I didn’t open it and write in it. That amazes me. It’s definitely my compass for the day.
I didn’t know on January 1, 2022 how much I would need this system. 2022 turned into a year of advocating for my elderly father and aunt with many, many phone calls to people in Washington state. With my bullet journal, I’ve been able to write everything down so I don’t have to rely on my increasingly unreliable memory. It has provided a huge sense of ease and relief, which has been invaluable during this difficult year. It’s also helped me stay on track with my business and my life while living with these external pressures.
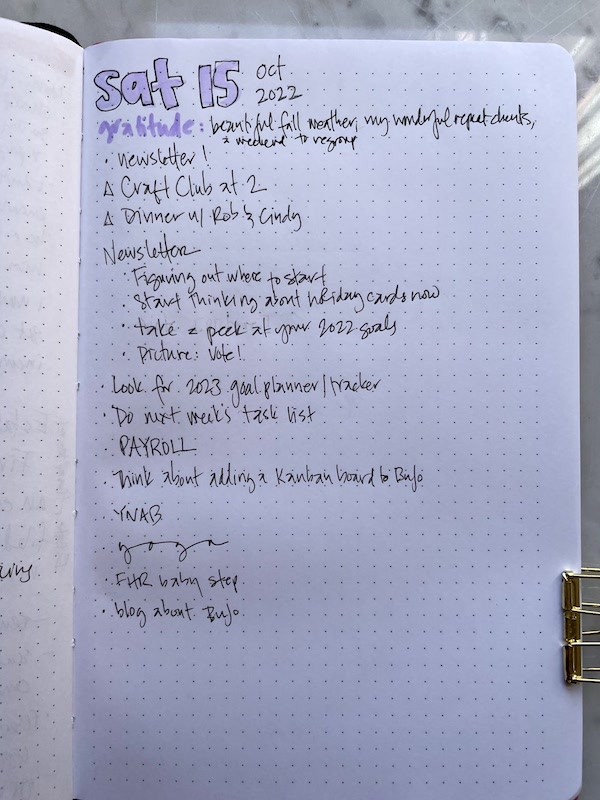
The core of my bullet journal is my daily log. At the start of each day, I write a header, usually followed by a gratitude list, and then I start in on tasks and appointments for the day. It is within this daily log that I write all my notes as thing come about. I use an index at the beginning of the journal to note on which page I took those notes so I can find them later. (This is critical.)
Here’s a photo of today’s daily log, taken at the beginning of the day before I actually had much to take notes about. This can give you an idea of how simple my system is:
As I said above, the beautiful thing about the bullet journal system is that you can make it your own. Here are some ways that I’ve customized my journal:
- I don’t use a monthly spread. I keep my calendar electronically, so I don’t see a need for one.
- I do create a monthly highlights and habit tracker page at the beginning of each month (there’s a picture of it in my February post). It’s one of my favorite features of my bullet journal.
- I don’t do a weekly spread, though I do try to create a weekly task list that I refer to throughout the week as I’m creating my daily task list in my daily log.
- I try to write a weekly reflection, and also reflections after big events (like my father’s passing). I also use my bullet journal to record the thoughts I have during my monthly floats in a flotation tank.
- I always draw a table with my rates in my journal (by session length and team size) so when I’m doing an estimate I don’t have do any math.
- I keep a log of each day’s Wordle solution, how many guesses it took me and what my start word was. I know, I’m a weirdo.
- I allow myself to be creative and make my bullet journal pretty, without creating pressure on myself to do so. I only do it when I have time and consider it enjoyable. I try hard not to let a desire to make it pretty get in the way of my actually creating a spread in my bullet journal.
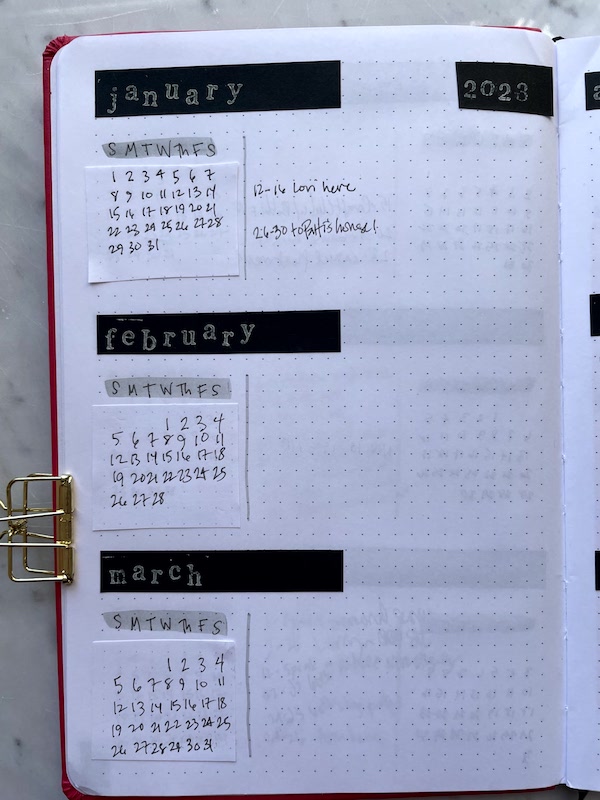
Here’s a picture of my FutureLog, in which I draw a year’s worth of small monthly calendars at the beginning of the journal. I have it span four pages so each page has three months on it. I write upcoming events (and sometimes past events) there. This is about as fancy as I get. In this case, you’ll notice that I messed up the days on the calendar and had to apply a patch with the correct days. No big deal.
I’ve developed some notebook preferences. I’m just about to finish my fifth notebook of 2022. I’ve had the chance to try out a few different types, and have to come to realize that I prefer a dot grid journal, and a stiff enough cover that I can write on my lap. (I did try a journal with black pages, but that lasted only one week and 29 pages because of the front-of-the-book spreads, so I don’t even count it.) My favorite is the Quo Vadis Habana Notebook. I’ve gone through three of them. I like the size and the slightly lighter paper thickness, which makes the notebook easier to carry around. Unfortunately, I can’t seem to find any for sale online right now. I do have one Habana waiting in the wings, but I think for my next journal I’m going to try the Leuchtturm1917 B5 dotted notebook I bought when I was in Walla Walla last month.
2025 update: Since writing this post more than two years ago I’ve developed a solid preference for the Dotted Journal Pro Size B5 from Scribbles That Matter. I’ve used these for my last four journals (at least) and I love them.
If you’re curious about using a bullet journal, I encourage you to let go of perfectionism and just give it a shot. Don’t spend a whole lot more time seeing how other people do it. Just get in touch with what’s important to you about using a paper journal, embrace good enough, and go for it. You can always refine it as you go!
A year with my electric car
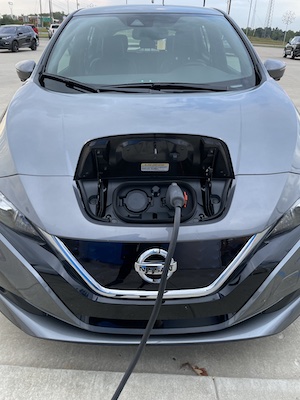
On October 2, 2021, I took a train across the state to Kansas City to pick up the 2022 Nissan LEAF SL-Plus I’d just leased. I then drove it 250 miles home to St. Louis. (I blogged about the car buying (and selling) experience at the time.)
I literally hadn’t owned a new car since 2005. And this car felt newer than new because it has technology I hadn’t experienced before. The trip home became a bit rocky when I discovered that the charger in Defiance, Missouri, that I had scoped out was out of order. Since it was getting dark, I took a room in a hotel in Columbia and headed out the next morning to a charging station in Kingdom City that was, thankfully, operable. (The car dealership, Dream Nissan, paid all my travel expenses!)
In the first month of ownership, until the electrician could get the proper electricity added to my garage, I charged at an EVGO station at my bank, just a mile from my house. Once I had the electricity in my garage and the charging cable that came with the car installed, I was in heaven. It’s like having a gas station in my garage. All I have to do is remember to look at my battery charge level when I pull into the garage and decide whether I need to plug it in. Depending on how much I’m driving, I plug in usually about once a week.
Do I recommend getting an electric car? For me people like me, absolutely. Almost all my driving is local. The range on my car is about 240 miles on a full charge. There are very few places I go that I can’t get to and from without charging. I have one client just out of range and I take my husband’s Honda Accord when I work with her.
I have had to use a rapid charger outside my home just once in the eleven months since my in-garage charging station was installed. And that was because I forgot to charge the night before. Rapid charges are harder on battery longevity, so I’m glad I’m able to do my charging at home.
On the one-year anniversary of being an EV enthusiast, I thought I’d share the things I love about my Nissan LEAF:
- It’s quiet.
- It’s zippy—it accelerates very quickly, so merging onto the interstate is a breeze.
- With zero emissions, it’s good for the environment.
- It has most of the modern technology I like in a car, including Apple CarPlay, heated seats and heated steering wheel
- The safety features are terrific.
- A hatchback, it’s roomy enough for me to carry the things I need.
- It’s the most compact car I’ve owned since my 1998 Honda Civic and it’s easy to fit into my small city garage.
- It’s just plain fun to drive!
There are a few things I don’t love about the car:
- I’m not comfortable taking it on long trips (because of range anxiety), when I would really enjoy driving it
- It requires USB connection to the phone in order to connect to CarPlay (but I took care of that buying this bluetooth adapter).
- Sometimes when my phone is plugged into the USB cable, the audio when talking on the phone is unbearably crackly. That’s a known bug, I think. And the bluetooth adapter (above) has taken care of the problem.
I wasn’t nervous about driving an electric car because my friend and podcast co-host, Shannon Wilkinson has a 2021 Nissan LEAF and heartily recommended it. I learned long ago that I can’t go wrong taking Shannon’s recommendations (hence, the podcast). And then her husband, Mike, told me about the bluetooth adapter that took away my least favorite thing about the car.
If you’ve been toying with the idea of getting an electric car and were hesitating due to the lack of charging infrastructure (which I sure hope will be getting better), I urge you to think about having a charging station installed in your garage, if possible. It’s not a prerequisite, though. Shannon and Mike don’t have garage and get by without one. Also, think about how much you actually drive. For daily commutes it might be just what you need.
Worth repeating: The beauty of vertical storage
I originally wrote this post in 2019 and I’m still embracing vertical storage. So I thought I’d share this simple principle again.
To the extent possible, I love storing things vertically, rather than horizontally. Think about how files are stored in a file cabinet—it’s much easier to access them than a stack of file folders.
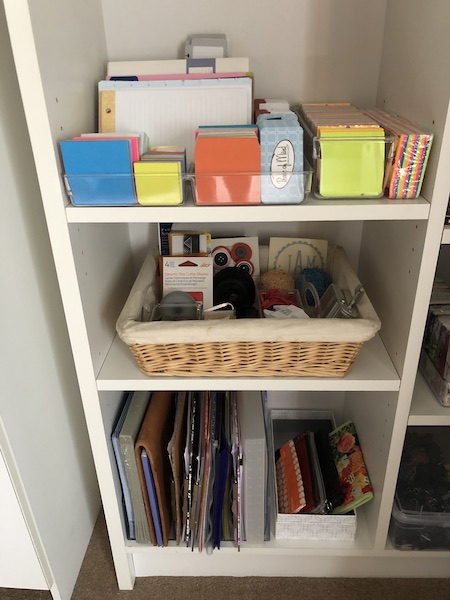
But vertical storage isn’t just for files. I love using the principle all around my house (and with clients). For my office supplies, for example, I have three shelves in my office supply closet where I store supplies vertically (see the photo below). Notice how my Post-it® notes and other supplies are stored vertically using acrylic containers (a divided one similar to this and a 4 × 12 × 3 like this) on a shelf. I used small containers inside a basket so help me store as much as I can vertically on the middle shelf of the photo. And on the shelf, this magazine sorter allows me to store clipboards and portfolios vertically. I repurposed a box from Bare Minerals so store a small collection of handy pouches.
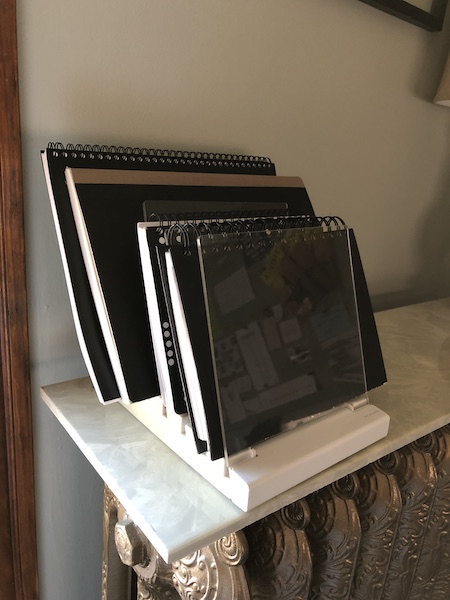
I have some notebooks I like to keep handy on the radiator behind my desk. One of them is the one grab when I’m on the phone on a business call. By using a desktop file holder, I can store notebooks vertically so I can easily (and silently) grab the right one when I need it.
Long before Marie Kondo was telling us how to fold, I was folding my t-shirts in half again and storing them vertically in the drawer. I love that it enables me to see the shirts and just pluck out the one I want. I do the same thing with my leggings—I store them vertically and use this closet drawer organizer to keep them upright.
When you’re organizing in your home, I encourage you to think about how you might integrate vertical storage. I think you’ll find it life-enhancing!
Are you registered to vote?
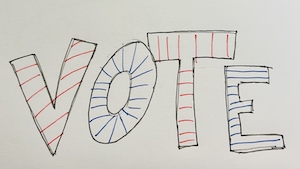
Facebook just told me that today is National Voter Registration Day here in the U.S. So it’s a good time to remind you to check to make sure you’re registered to vote. The mid-term elections here in the U.S., which will be held on November 8, will be here before we know it. From the top of the ballot to the bottom, it’s a very important election.
You can go to Vote.org to make sure you’re registered. It includes links to each state’s information so while you’re there you can check your polling place, as well as rules about mail-in or absentee voting. In many places, the rules have changed, so it’s important to plan ahead.
If you live in Missouri (like I do) and plan to mail in an absentee ballot, it will have to be notarized. If you’re in St. Louis I am happy to notarize your ballot for you. Just shoot me an email to make arrangements to come to my porch.
Voting has always been important. But each year it feels even more vital. If you haven’t already, please make a plan today to vote!
Daily exercise for the win!
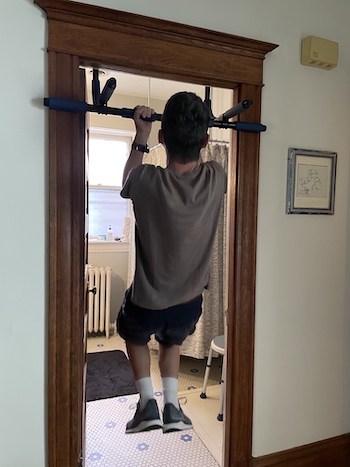
My brother, Larry, is visiting me right now. He lives in Australia, so I don’t get to see him often. Our father died last month in Walla Walla, Washington, and Larry made an emergency trip to the U.S. After the memorial service, he came back to St. Louis with my husband and me.
We’re having a great time hanging out and catching up. And we’re even learning a thing or two from one another. One thing that Larry’s really impressed me with his daily habit of doing pull ups. Larry is a slender, strong 63-year-old man. He’s genetically inclined to being slender but he also has muscles. And now I know why.
Every day, Larry does ten pull ups.
He tells me that he started his pull-up routine in 1995. He started with only four, which was very easy for him to do. He slowly increased the number and now he’s up to ten. Along the way, he’s created a few rules for himself. If he can’t do all ten because he doesn’t feel strong enough, he lets himself take a break. He can make up the difference a little later or, barring that, he’ll make up the difference the next day.
When I asked Larry about his daily exercise habit and how he’s managed to keep it up for literally decades, he said,“It’s easy. That’s the beauty of it. I knew that I had to be flexible about it because I’d lose heart if I tried to force myself to do something that was too difficult. I knew that if I could do it every day it would be good for me. And it’s not something that’s impossible to do.”
There are so many things I love about this:
- His goal is realistic
- He builds some flexibility into it
- He allows himself to fall short but makes up for it
- He’s reaping visible benefits from this daily habit
I feel the same way about my daily yoga practice, which has fallen by the wayside due to a variety of circumstances. But Larry’s inspiring me to get right back on it and allow myself to just do a little bit of yoga and count it as a success. I know daily yoga is beneficial. (I didn’t miss a day for over a year during the pandemic.) My promise to myself is that I’ll let it be easy.
Larry is reminding me that when it comes to exercise (and really almost everything) any effort is better than no effort. His daily ten pull ups takes him literally a couple of minutes. (It’s fortunate that we happen to have a pull up bar just like the one he has at home.) And he’s definitely reaping the benefits!
Links
- Organize Your Family History
- Peace of Mind Spending
- Institute for Challenging Disorganization
- NAPO St. Louis
- Getting to Good Enough podcast
- Are you interested in becoming a professional organizer?
- Ravelry
- Shannon Wilkinson, life coach
- National Association of Productivity and Organizing Professionals


